
Step-by-Step Instructions
Step 1 — Caramelize the Onions
Melt the butter in a large, wide skillet over medium heat — a 12-inch skillet is ideal, as the wider surface area allows more of the onion to be in contact with the hot pan at once, speeding the caramelization. Add the sliced onions and the pinch of salt. The salt helps draw moisture out of the onions early in the cooking process, which speeds the initial softening phase. Spread the onions into an even layer across the pan and allow them to cook undisturbed for 2 to 3 minutes to begin softening at the base, then stir and turn them.
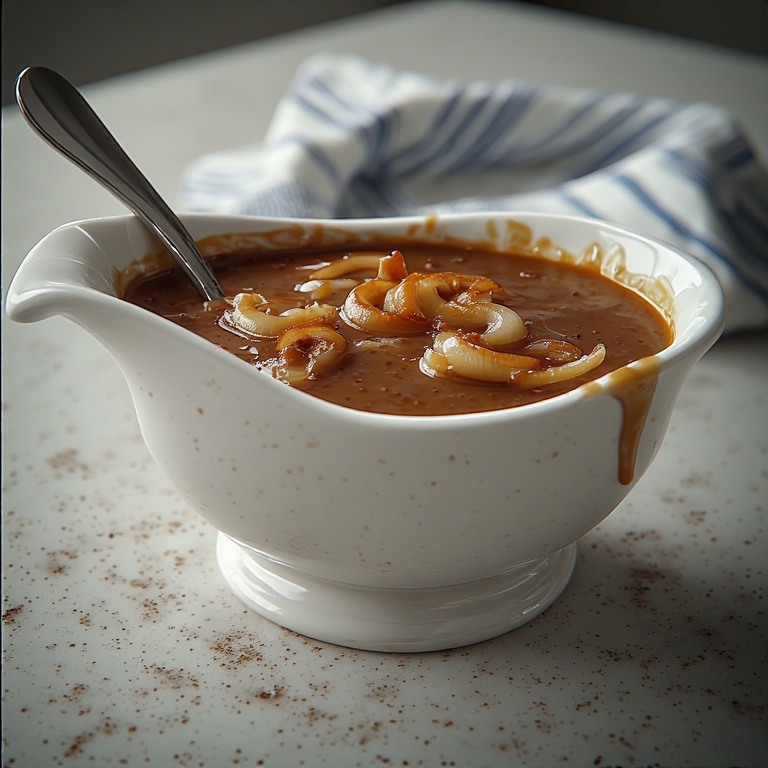
Continue cooking, stirring and turning every 3 to 5 minutes, for 30 to 45 minutes total. The onions will go through several phases: first they’ll soften and become translucent; then they’ll begin releasing moisture and appearing wet; then the moisture will evaporate and they’ll begin to reduce in volume; finally they’ll start developing color, going from pale gold to deeper amber to the rich, dark golden-brown that indicates proper caramelization. The finished caramelized onions should be a deep, warm amber color throughout, significantly reduced in volume from the raw onions, and very soft and yielding. If the onions begin sticking to the bottom of the pan at any point, deglaze with a tablespoon of red wine vinegar, dry white wine, or balsamic vinegar — the deglazing liquid lifts the browned bits from the pan and adds flavor to the finished sauce.
Step 2 — Add the Broth and Seasonings
Once the onions are deeply caramelized, pour in 1¾ cups of the beef broth — reserving the remaining quarter cup for the cornstarch slurry. Add the Worcestershire sauce and Dijon mustard. Stir everything together to combine the mustard and Worcestershire into the broth and lift any remaining browned bits from the bottom of the pan. Bring the mixture to a low boil over medium heat, stirring occasionally.
Step 3 — Thicken the Gravy
In a small bowl, whisk together the reserved quarter cup of cold beef broth and the cornstarch until the cornstarch is completely dissolved and no lumps remain — this cold slurry is what prevents lumps in the finished gravy. Once the gravy is at a low boil, slowly drizzle the cornstarch slurry into the skillet while whisking constantly. Add it in a thin stream rather than all at once, to ensure it incorporates smoothly rather than clumping. Continue whisking and allow the gravy to boil for 30 to 60 seconds after all the slurry is incorporated — cornstarch needs to reach and sustain a boil briefly to fully activate and produce a stable, clear thickening rather than a starchy-tasting one.
Step 4 — Season and Finish
Reduce the heat to low. Taste the gravy and adjust the seasoning with salt and freshly ground black pepper — start cautiously, since the Worcestershire sauce and the broth together provide meaningful seasoning and the gravy may need only black pepper and no additional salt. Whisk in the chopped fresh thyme. For the brightest herb flavor, serve the gravy promptly after adding the thyme — the delicate aromatic compounds in fresh herbs dissipate with prolonged heat.
Tips for Perfect Onion Gravy
Don’t rush the caramelization. This is the essential rule of onion gravy. Onions cooked for 15 minutes are softened and slightly sweet but not caramelized. Onions cooked for 45 minutes at the right temperature are deeply golden, intensely sweet-savory, and the foundation of a truly great sauce. There is no shortcut that produces the same result. Plan the caramelization into your cooking timeline and allow 30 to 45 minutes for it.
Slice the onions as thinly as possible. Thin slices cook more quickly, caramelize more evenly, and produce a more uniform texture in the finished gravy than thick pieces. Use the longest, thinnest slices you can manage — a mandoline set to 1/8 inch produces ideal results; a sharp knife with careful technique produces the same outcome more slowly.
Stir, but not constantly. The onions need sustained contact with the hot pan surface to develop the browning reactions that produce caramelization. Stirring every minute or two prevents sticking but allows the bottom of the onion pile enough contact time with the heat to develop color. Constant stirring prevents the heat from building to the right level and slows the caramelization considerably.
Deglaze when the pan sticks. Some sticking during caramelization is normal and expected — the browned bits on the bottom of the pan are concentrated flavor that should be incorporated rather than discarded. When sticking becomes excessive, a tablespoon of liquid (wine, vinegar, or even just a splash of the measured broth) will lift them immediately. This deglazing step adds depth to the finished sauce every time it’s done.
Add the cornstarch as a cold slurry, never dry. Cornstarch added directly to a hot liquid without first dispersing in cold liquid forms lumps that are very difficult to remove from the finished sauce. Always whisk the cornstarch into cold broth until smooth before adding it to the hot gravy.
Frequently Asked Questions
Can I make this gravy ahead of time?
Yes — and it actually improves with time as the thyme infuses further into the sauce. Make it up to 3 days ahead and store in an airtight container in the refrigerator. Reheat on the stovetop over low heat, stirring frequently and adding a small splash of broth if the gravy has thickened too much during storage. Reheat in the microwave at reduced power, stirring once or twice during heating.
Can I freeze onion gravy?
Onion gravy can be frozen for up to 3 months, but with one important caveat: cornstarch-thickened sauces sometimes thin out after freezing and thawing, producing a less cohesive sauce when reheated. If you plan to freeze it, you can thicken it again after reheating with a fresh cornstarch slurry (a teaspoon of cornstarch whisked into a tablespoon of cold broth). For best results, freeze the caramelized onion base without the cornstarch and add the thickening when reheating.
Can I make this vegetarian?
Yes. Replace the beef broth with a good-quality vegetable broth. Choose a vegetable broth with a clear, savory flavor rather than one that tastes of sweet vegetables — the broth should support the caramelized onions’ depth rather than add an incongruent sweetness. Ensure that your Worcestershire sauce is vegetarian as well — traditional Worcestershire contains anchovies; several brands offer vegetarian versions.
My onions aren’t browning — what am I doing wrong?
The most common causes are the pan being too cold (the heat isn’t high enough to trigger the browning reactions), the pan being overcrowded (too many onion slices for the pan size means they steam in each other’s moisture rather than browning), or the onions being stirred too frequently. Use a wide pan, medium heat, and patience — stir every 3 to 5 minutes rather than constantly, and maintain a heat level where you can hear a steady gentle sizzle from the pan.
Can I use this gravy with something other than beef-based dishes?
Yes — onion gravy is remarkably versatile. It works beautifully over pan-fried chicken breasts or thighs, pork chops, meatloaf, and sausages of all kinds. For chicken or pork, substitute half the beef broth with chicken broth for a slightly lighter base that complements white meat more naturally. The caramelized onion flavor works with virtually any savory main dish.
Variations Worth Trying
Red wine onion gravy: After the onions are fully caramelized, deglaze the pan with half a cup of dry red wine (a Burgundy, Côtes du Rhône, or any dry table wine) and allow it to reduce by about half before adding the beef broth. The wine adds a fruity, slightly tannic complexity and a deeper color to the finished gravy that’s particularly suited to serving alongside red meat and roasted meats. This is the variation most commonly found in French and British restaurant kitchens.
Balsamic onion gravy: Add a tablespoon of good-quality balsamic vinegar to the caramelized onions along with the broth. The balsamic’s concentrated, slightly sweet acidity adds a depth and complexity that makes the finished gravy taste almost like it was made with wine. A small amount provides a lot of flavor — don’t increase beyond a tablespoon or the vinegar becomes identifiable in the finished sauce.
Mushroom and onion gravy: Add 8 ounces of thinly sliced cremini or button mushrooms to the skillet when the onions are about halfway through caramelizing. The mushrooms cook down alongside the onions and contribute an earthy, umami-rich depth to the finished sauce. This variation is particularly good over mashed potatoes, meatloaf, and grilled sausages — essentially a pub-style mushroom and onion sauce.
Sage and onion gravy: Substitute four large fresh sage leaves, finely chopped, for the thyme. Sage has a more assertive, slightly peppery, earthy character than thyme and is the traditional herb pairing with pork dishes in British and Italian cooking. Sage onion gravy is particularly good alongside pork loin, roast pork shoulder, or pork sausages — a natural pairing that the Italian tradition also recognizes in dishes like saltimbocca.
Richer butter-finish version: Just before serving, remove the pan from the heat and whisk in two tablespoons of cold unsalted butter cut into pieces, one piece at a time. This butter-mounting technique (borrowed from French sauce-making) produces a sauce that’s noticeably more velvety, glossy, and rich than the standard version without adding flour or cream. Serve immediately after mounting — the sauce will break if allowed to boil after the butter is added.
What to Serve with Onion Gravy
Onion gravy is one of the most versatile sauces available — it improves nearly anything it’s placed alongside. Over mashed potatoes it creates one of the simplest and most satisfying comfort food plates possible. Alongside bangers (pork or beef sausages) and mashed potatoes it’s the classic British pub dish of bangers and mash in its most honest form. Over pan-fried chicken, hamburger steaks, or meatloaf it transforms simple home-cooked protein into something that tastes deliberately sauced and carefully prepared. Alongside Yorkshire puddings it provides the traditional British Sunday roast accompaniment. Poured over egg noodles with sliced sausage it’s a very quick, very satisfying weeknight dinner. Spooned over thick slices of buttered bread for an open-faced sandwich it’s a less formal but equally comforting presentation. Wherever this gravy goes, it elevates.
Storage
Store leftover onion gravy in an airtight container in the refrigerator for up to 3 days. The gravy thickens considerably when cold and the onions continue to infuse the sauce during storage, producing a slightly more complex-tasting sauce on the second day. Reheat gently on the stovetop over low heat, whisking in a splash of broth to restore the original consistency, or reheat in the microwave at reduced power. Freeze for up to 3 months — see the FAQ above for notes on cornstarch thickening after freezing.
Patience Rewarded
Caramelized Onion Gravy is a sauce that asks for one thing and returns it many times over: patience with the caramelization. Spend 30 to 45 minutes with the onions in the pan, let them develop their deep golden color at their own pace, and the resulting sauce will have a depth and complexity that no shortcuts can replicate. The broth, Worcestershire, mustard, and thyme are important, but they’re building on a foundation that only proper caramelization can provide. Do the onions right, and the rest of the recipe is simple. The result is a gravy worth knowing.
Enjoy!