

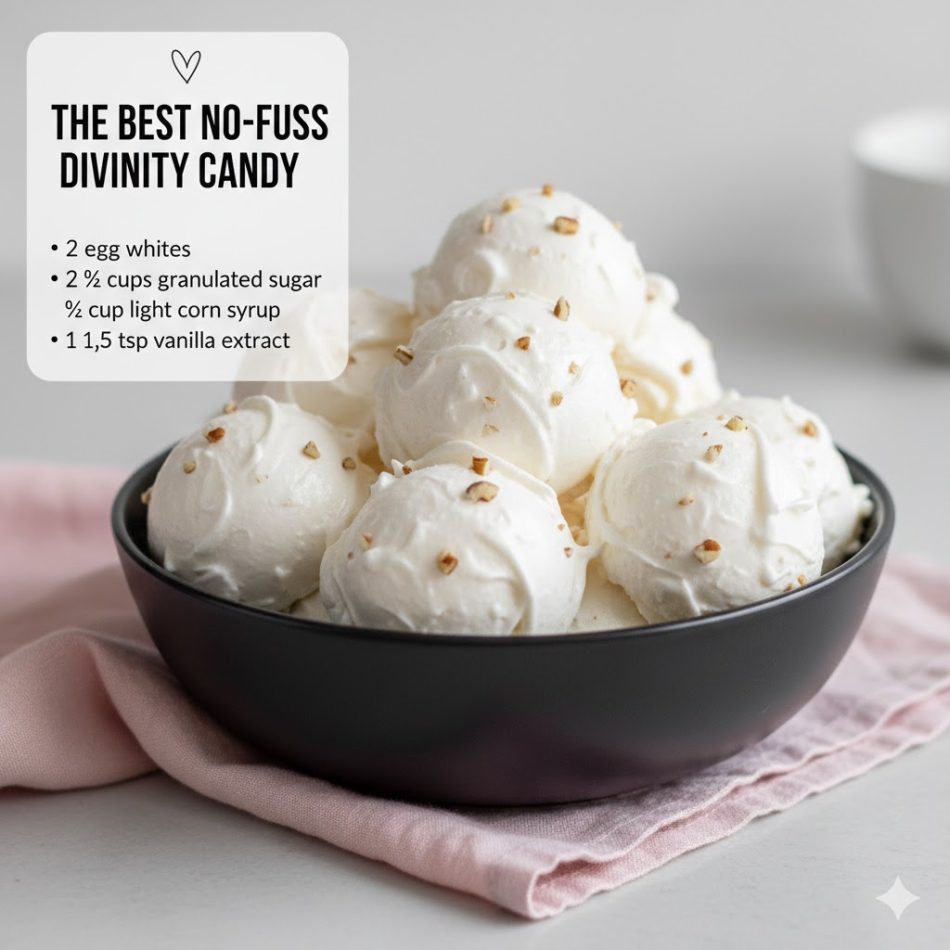
Classic Southern Divinity Candy: Light, Fluffy, and Perfectly Sweet
Few candies capture the magic of traditional Southern confectionery quite like divinity. This cloud-like confection transforms simple ingredients—egg whites, sugar, and corn syrup—into ethereal bites that literally melt on your tongue. Despite its reputation for being temperamental, this time-tested recipe delivers consistent results when you understand the key principles of candy making.
Divinity has graced Southern holiday tables for generations, often appearing alongside fudge, pralines, and other homemade sweets. Its snowy white appearance and delicate texture make it as visually appealing as it is delicious. While the process requires attention to detail and proper timing, the reward is a nostalgic treat that impresses everyone who tries it.
This isn’t overly complicated candy making—it’s about respecting the science of sugar and following the steps carefully. Once you master the technique, you’ll have a reliable recipe that produces perfect divinity every time.
Why This Recipe Delivers Perfect Results
Foolproof When Followed Carefully – This recipe provides clear temperature guidelines and timing that eliminate guesswork. Follow the instructions precisely and you’ll achieve that signature soft-yet-stable texture every time.
Simple Pantry Ingredients – No exotic components or specialty items required. Egg whites, granulated sugar, corn syrup, and vanilla create something magical from basics you likely already have.
Perfectly Balanced Sweetness – Unlike some divinity recipes that taste cloying, this version achieves ideal sweetness that satisfies without overwhelming. The texture remains light and airy rather than dense.
Classic Texture Done Right – Proper divinity should be fluffy enough to feel weightless yet stable enough to hold its shape for days. This recipe achieves that perfect balance through precise technique.
Naturally Gluten-Free – Since divinity contains no flour or grain-based ingredients, it’s inherently gluten-free, making it suitable for various dietary needs.
Customizable with Add-Ins – The basic recipe welcomes variations. Add pecans for traditional Southern style, or leave them out for pure white candy. Other nuts or even dried fruit work beautifully.
Understanding the Key Ingredients
Room Temperature Egg Whites (2) – Temperature matters tremendously here. Room temperature egg whites whip to greater volume and incorporate more air, creating that signature fluffy texture. Cold egg whites simply won’t achieve the same structure. Separate your eggs and let the whites sit on the counter for 30 minutes before beginning.
Granulated Sugar (2½ cups) – Regular white sugar dissolves cleanly and completely, creating the smooth syrup base essential for proper divinity. The sugar provides structure and sweetness while allowing the candy to set correctly.
Water (½ cup) – Water dissolves the sugar evenly as it heats, preventing crystallization and allowing the mixture to reach the proper temperature smoothly. It also helps prevent graininess in the final candy.
Light Corn Syrup (½ cup) – This is non-negotiable for successful divinity. Corn syrup prevents sugar crystallization, keeping your candy smooth rather than grainy. Light corn syrup works best because it doesn’t add color or compete with the vanilla flavor.
Salt (⅛ teaspoon) – This tiny amount balances the sweetness and enhances the vanilla without making the candy taste salty. It brings all the flavors into focus.
Finely Chopped Pecans (½ cup, optional) – Traditional Southern divinity often includes pecans. Chop them small so they distribute evenly throughout the candy. Toast them first for enhanced flavor if desired.
Vanilla Extract (1½ teaspoons) – Pure vanilla extract adds warm, familiar flavor that rounds out the sweetness. This goes in at the very end to preserve maximum vanilla aroma.
Detailed Step-by-Step Instructions
Complete measurements appear in the recipe card below.
Prepare Your Workspace – Line a large baking sheet with parchment paper. Butter two teaspoons thoroughly—these will be your scooping tools later. Having everything ready before you start is crucial because divinity moves quickly once it’s ready.
Bring Egg Whites to Room Temperature – Separate your eggs and let the whites sit at room temperature for approximately 30 minutes. This small step dramatically improves how well they whip and how much volume they achieve.
Cook the Sugar Syrup – Combine granulated sugar, water, light corn syrup, and salt in a large microwave-safe glass measuring cup. Heat on high power for 4 minutes, then stir to ensure even heating. Continue heating in 2-minute increments, stirring between each session, until the syrup reaches the hard-ball stage at 260°F.
Monitor Temperature Carefully – Once your syrup reaches approximately 250°F, reduce heating to 1-minute increments. Check the temperature after each minute. This prevents overshooting—once sugar syrup goes past the target temperature, there’s no going back.
Begin Whipping Egg Whites – When your syrup is close to reaching 260°F, start beating the room temperature egg whites on medium speed. Beat until stiff peaks form—the whites should stand straight up when you lift the beater, not curl over.
Combine Hot Syrup and Egg Whites – This is the critical moment. Increase your mixer speed to high and very slowly pour the hot syrup into the whipped egg whites in a steady, thin stream. Aim for the side of the bowl rather than directly onto the beaters to prevent splattering. Work carefully—this syrup is extremely hot.
Beat Until Proper Consistency – Continue beating the mixture for 15-20 minutes. This extended beating time is not optional—it’s what transforms the mixture from glossy and liquid to matte and firm. You’ll know it’s ready when the candy loses its shiny appearance and holds its shape when dropped onto parchment paper. If you drop a spoonful and it flattens, keep beating.
Add Flavor and Texture – Once the candy reaches the proper consistency, quickly stir in vanilla extract and chopped pecans (if using). Work fast because the candy will begin setting rapidly.
Scoop and Set – Using your buttered teaspoons, drop rounded spoonfuls of divinity onto the prepared parchment paper. Work quickly but carefully to shape each piece. The candy will hold whatever shape you give it.
Allow to Dry Completely – Let the divinity sit at room temperature until completely dry to the touch. This typically takes several hours, though overnight is ideal. Don’t refrigerate—moisture is divinity’s enemy.
Essential Tips for Success
Weather Matters – Humidity is divinity’s nemesis. Make this candy on dry, low-humidity days for best results. High humidity can prevent proper setting and leave your candy perpetually sticky. If you live in a humid climate, use air conditioning or a dehumidifier while making divinity.
Invest in a Candy Thermometer – While you can use the cold-water test (dropping syrup into cold water to check consistency), a candy thermometer removes guesswork and provides consistent results. Temperature accuracy is critical.
Don’t Rush the Beating – That 15-20 minutes of beating isn’t a suggestion. Divinity needs this time to develop proper structure. If you stop too early, the candy will be too soft and may not set properly.
Watch for Visual Cues – The candy is ready when it loses its glossy shine and becomes matte. It should also hold soft peaks when you lift the beaters, similar to meringue.
Work Quickly at the End – Once divinity reaches the proper consistency, it begins setting fast. Have your parchment paper ready and scoop quickly to shape all the pieces before it becomes too stiff.
Butter Those Spoons – Buttering your scooping spoons prevents sticking and makes forming neat pieces much easier.
The Science Behind the Hard-Ball Stage
The hard-ball stage occurs when sugar syrup reaches 260°F. At this temperature, a small amount of syrup dropped into cold water forms a firm ball that holds its shape but remains pliable when pressed. This specific temperature is crucial because it’s hot enough to create stable candy but not so hot that the candy becomes brittle.
Reaching this exact stage ensures your divinity sets properly while maintaining that soft, fluffy interior texture. Too cool and it won’t set; too hot and it becomes hard rather than tender.
Making Divinity Without a Candy Thermometer
If you don’t own a candy thermometer, you can still make successful divinity using the traditional cold-water test. Keep a bowl of very cold water nearby. At intervals during cooking, drop a small amount of hot syrup into the cold water. When it forms a firm ball that you can roll between your fingers but that still gives slightly when squeezed, the syrup has reached the hard-ball stage.
This method requires practice to perfect, but generations of candy makers used it successfully before thermometers became common.
Troubleshooting Common Issues
Why Is My Divinity Grainy?
Graininess occurs when sugar crystallizes. Common causes include omitting corn syrup, stirring the syrup too vigorously after it starts boiling, or exceeding the target temperature. Following temperature guidelines precisely and using corn syrup prevents this issue.
Why Didn’t My Divinity Set?
Under-beating is the most common culprit. The candy needs that full 15-20 minutes of beating to develop proper structure. High humidity also prevents setting. Additionally, if your syrup didn’t reach 260°F, the candy won’t firm up properly.
Why Is My Divinity Sticky?
Stickiness usually results from high humidity or syrup that didn’t reach the correct temperature. Make sure you’re cooking on a dry day and that your syrup truly hits 260°F.
Can I Fix Divinity That Didn’t Turn Out?
If divinity didn’t set, you can try reheating it gently and beating again, though results vary. If it’s too hard, there’s unfortunately no fix—temperature control matters from the start.
Storage Guidelines
Room Temperature Storage – Store divinity in an airtight container at room temperature for up to one week. Place parchment paper between layers to prevent pieces from sticking together. Keep the container in a cool, dry location away from humidity.
Avoid Refrigeration – Never refrigerate divinity. The moisture in refrigerators will make the candy sticky and may cause it to weep or dissolve. Room temperature storage in airtight containers is essential.
Freezing Not Recommended – While technically possible, freezing affects texture and isn’t advisable. The moisture from thawing can ruin the candy’s delicate structure.
Gift Packaging – For gifting, place divinity in decorative tins or boxes lined with parchment or wax paper. Separate layers with additional paper. Package only completely dry pieces and advise recipients to store at room temperature in airtight containers.
Hand Mixer vs Stand Mixer
Both types of mixers work for making divinity, but a stand mixer offers significant advantages. The 15-20 minutes of continuous beating requires stamina with a hand mixer. Stand mixers allow you to walk away briefly while maintaining consistent beating speed.
If using a hand mixer, be prepared for an arm workout. You might also need slightly more time since hand mixers sometimes beat less efficiently. Take breaks if needed, but keep the mixer running on high speed.
Make-Ahead Possibilities
Divinity is excellent for advance preparation, making it perfect for holiday baking when time is precious. Once fully set and dried, it stores well for several days, allowing you to make it well before you need it.
For holiday planning, prepare divinity up to a week ahead. Store properly in airtight containers and it will taste just as fresh as the day you made it. This makes assembling cookie trays and gift boxes much less stressful.
Perfect Pairings and Serving Ideas
Holiday Cookie Trays – Divinity’s white, cloud-like appearance provides beautiful visual contrast on mixed cookie and candy platters alongside darker fudge, chocolate-covered treats, and golden cookies.
Coffee and Tea Service – The sweet, delicate flavor pairs beautifully with strong coffee or black tea. Serve divinity alongside other petit fours or small sweets for elegant afternoon gatherings.
Homemade Gift Boxes – Package divinity with other homemade candies like pralines, fudge, or chocolate bark for impressive gift presentations that show care and effort.
Dessert Garnish – Use small pieces of divinity to garnish cakes, ice cream, or other desserts for added texture and sweetness.
Why This Recipe Endures
Divinity represents a particular moment in American candy making history when home cooks created elaborate confections from simple ingredients. While modern convenience offers countless candy options, there’s something special about making divinity from scratch—the process connects us to generations of home bakers who perfected this delicate art.
The recipe endures because, despite requiring attention and precision, it’s ultimately achievable for home cooks willing to follow directions carefully. The results—those impossibly light, sweet clouds—reward the effort many times over. Making successful divinity provides genuine accomplishment and creates treats that can’t be replicated by store-bought alternatives.
Final Thoughts
Divinity candy might seem intimidating at first, but understanding the science and following the process carefully makes success entirely achievable. Yes, weather matters. Yes, temperature precision is important. Yes, you need to beat the candy for the full time. But none of these requirements are impossible—they simply require respect for the craft.
Once you taste homemade divinity that turned out perfectly—fluffy, sweet, with that signature melt-in-your-mouth texture—you’ll understand why generations of Southern cooks have treasured this recipe. It’s candy making at its most magical, transforming humble ingredients into something truly special.
Prep Time: 20 minutes
Cook Time: 25 minutes
Total Time: 45 minutes
Yield: 30 pieces
Course: Dessert, Candy
Cuisine: American Southern
Difficulty: Intermediate
Special Diet: Gluten-Free