

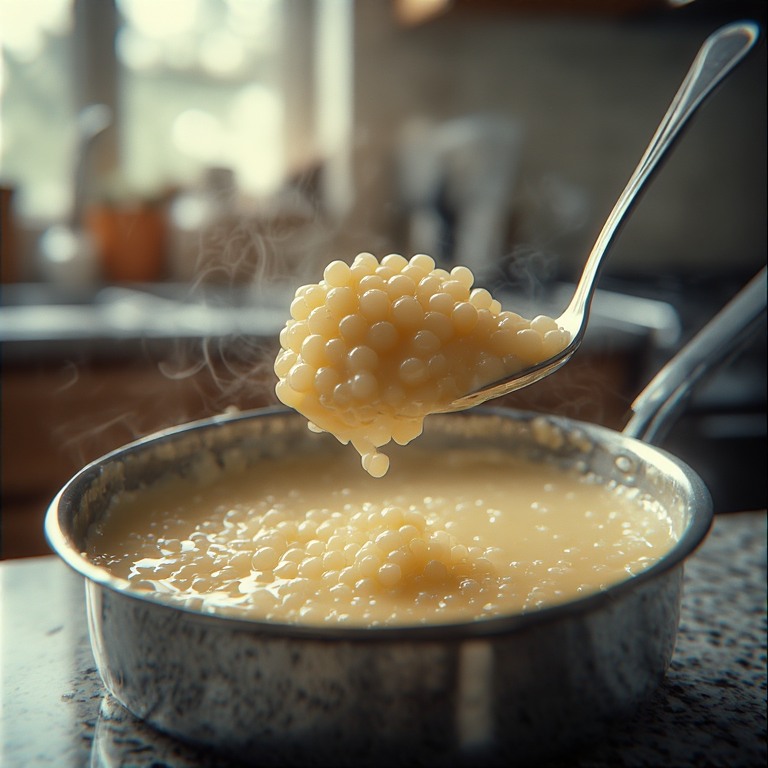
Step-by-Step Preparation
Complete measurements appear in the recipe card below.
Soak the Tapioca – Combine tapioca pearls and milk in a medium saucepan. Stir to distribute the pearls evenly, then let the mixture sit at room temperature for 20-30 minutes. This soaking period allows the pearls to hydrate, which dramatically shortens cooking time and ensures even tenderness throughout each pearl. If you’re planning ahead, you can soak them for up to an hour.
Begin Cooking – After soaking, place the saucepan over medium-low heat. Stir in the sugar until dissolved. Cook, stirring frequently to prevent sticking or scorching, until the mixture begins steaming and the tapioca pearls start appearing translucent around the edges. This takes approximately 10-15 minutes. Keep the heat gentle—rushing this step risks burning the milk on the bottom of the pan.
Temper the Egg – While the tapioca cooks, beat the egg lightly in a small bowl. When the tapioca mixture is hot and steaming, it’s time to temper. Slowly ladle about ½ cup of the hot liquid into the beaten egg while whisking constantly. This gradual warming prevents the egg from scrambling when it hits the hot pudding. Add another ladleful, whisking constantly, then pour this warmed egg mixture back into the saucepan.
Finish Cooking – Stir constantly while cooking the pudding for another 3-5 minutes over medium-low heat. The pudding should thicken noticeably and coat the back of a spoon. The tapioca pearls should appear mostly translucent with just a tiny white dot in the very center—they’ll finish cooking as the pudding cools. Don’t overcook or the custard can curdle.
Cool and Set – Remove the saucepan from heat. Let it sit for 10 minutes, stirring once or twice to prevent a skin from forming on top. During this resting period, the residual heat finishes cooking the tapioca pearls completely. Taste and adjust sweetness if desired—you can stir in additional sugar while the pudding is still warm and it will dissolve easily.
Serve or Chill – For warm pudding, ladle into bowls and serve immediately. The texture will be custardy and comforting. For chilled pudding, transfer to individual serving dishes or one large bowl, cover with plastic wrap pressed directly onto the surface, and refrigerate for at least 1-2 hours. The pudding thickens considerably as it cools.
Serving Suggestions
Classic Toppings – Fresh berries (strawberries, blueberries, raspberries) add bright color and tartness that balances the pudding’s sweetness. Sliced bananas create a classic combination. A spoonful of fruit jam or preserves adds concentrated fruit flavor.
Decadent Additions – Drizzle with caramel sauce or chocolate sauce for extra indulgence. A dollop of whipped cream turns this simple dessert into something more special.
Textural Contrasts – Sprinkle with toasted nuts (almonds, pecans, or walnuts) for crunch. Crumbled cookies or graham crackers add interesting texture.
Flavor Enhancements – A light dusting of cinnamon or nutmeg adds warmth. Toasted coconut flakes contribute tropical notes.
Creative Variations
Vanilla-Enhanced – Stir 1-2 teaspoons vanilla extract into the finished pudding for classic vanilla flavor. This doesn’t count as an additional ingredient in most kitchens since vanilla is a staple.
Extra-Rich Version – Replace ½ cup of the milk with heavy cream or half-and-half for ultra-creamy, luxurious pudding.
Coconut Tapioca – Substitute part or all of the milk with canned coconut milk for tropical flavor and dairy-free option. Note that coconut milk creates slightly thicker pudding and adds subtle coconut taste.
Chocolate Tapioca – Stir in 2-3 tablespoons cocoa powder with the sugar for chocolate pudding. Add a splash of vanilla too.
Flavored Milk Base – Infuse the milk by steeping a cinnamon stick, vanilla bean, or citrus zest in the warm milk before adding tapioca. Remove the aromatics before serving.
Individual Servings – Pour the finished pudding into small jars with lids for grab-and-go desserts or portion-controlled servings. Perfect for meal prep.
Storage and Make-Ahead Tips
Refrigerator Storage – Store cooled pudding in an airtight container or individual covered dishes in the refrigerator for 3-4 days. The pudding continues thickening over time.
Preventing Skin Formation – Press plastic wrap directly onto the pudding surface before refrigerating to prevent a skin from forming on top.
Reviving Thick Pudding – After a day or two in the refrigerator, pudding often becomes quite thick. Simply stir in milk, one tablespoon at a time, until you reach desired consistency. Mix thoroughly to incorporate smoothly.
Make-Ahead for Entertaining – This pudding is ideal for preparing a day ahead. The flavors develop and meld overnight, often tasting even better the next day.
Freezing Not Recommended – The texture changes significantly when frozen and thawed, becoming grainy and separated. This dessert is best enjoyed fresh or refrigerated.
Meal Pairing Suggestions
After Light Dinners – This pudding works perfectly after meals that aren’t too heavy. Pair it with roasted chicken, grilled fish, vegetable-focused pasta, or salad-based dinners.
Brunch Addition – Portion into small jars and serve alongside muffins, fruit salad, and coffee for a make-ahead sweet option that doesn’t require oven space during busy brunch preparation.
Weeknight Dessert – When you want something sweet but don’t have time or energy for elaborate baking, this delivers satisfaction with minimal effort.
Tips for Perfect Tapioca Pudding Every Time
Don’t Skip Soaking – The 20-30 minute soak isn’t optional. It ensures the pearls cook evenly and prevents tough centers.
Maintain Gentle Heat – Medium-low heat prevents scorching and allows the pudding to thicken gradually without curdling. Patience pays off.
Stir Frequently – Regular stirring prevents sticking and ensures even cooking throughout. This isn’t a set-and-forget recipe.
Temper Carefully – Take time to properly temper the egg. Rushing this step results in scrambled egg bits throughout your pudding.
Remember It Thickens – The pudding seems thin when hot but firms up considerably as it cools. Don’t overcook trying to achieve thick pudding on the stovetop.
Adjust Consistency – Too thick after chilling? Add milk. Too thin? Cook a bit longer or let it chill longer—it continues setting in the refrigerator.
Why This Dessert Disappeared (and Why It’s Coming Back)
Tapioca pudding fell out of favor during the era of convenience foods and elaborate dessert trends. Instant pudding mixes offered faster gratification, while trendy cakes and elaborate plated desserts captured attention. Somewhere along the way, simple stovetop puddings felt old-fashioned rather than classic.
But food trends are cyclical, and we’re seeing renewed appreciation for uncomplicated, from-scratch desserts that don’t require professional techniques. Tapioca pudding fits perfectly into this renaissance—it’s mindful cooking that produces genuine comfort without pretension or complexity.
The texture also appeals to modern palates increasingly interested in global cuisines. Those familiar with bubble tea or Asian desserts recognize and appreciate the pleasant chewiness of tapioca pearls.
Final Thoughts
In our rush toward complexity and novelty, we sometimes overlook the profound satisfaction of simple, well-executed classics. This tapioca pudding represents home cooking at its most honest—no tricks, no shortcuts, just quality ingredients treated with care and patience.
Making pudding from scratch is a small act of culinary self-sufficiency that connects us to earlier generations who created desserts from whatever the pantry provided. It’s meditative cooking that doesn’t demand intense focus but rewards attention with creamy, comforting results.
Whether you remember tapioca pudding fondly from childhood or you’re discovering it for the first time, this recipe offers something increasingly rare: uncomplicated pleasure.
Prep Time: 5 minutes
Soak Time: 20-30 minutes
Cook Time: 20 minutes
Total Time: 45-55 minutes
Servings: 4
Course: Dessert
Cuisine: American Traditional
Difficulty: Easy