

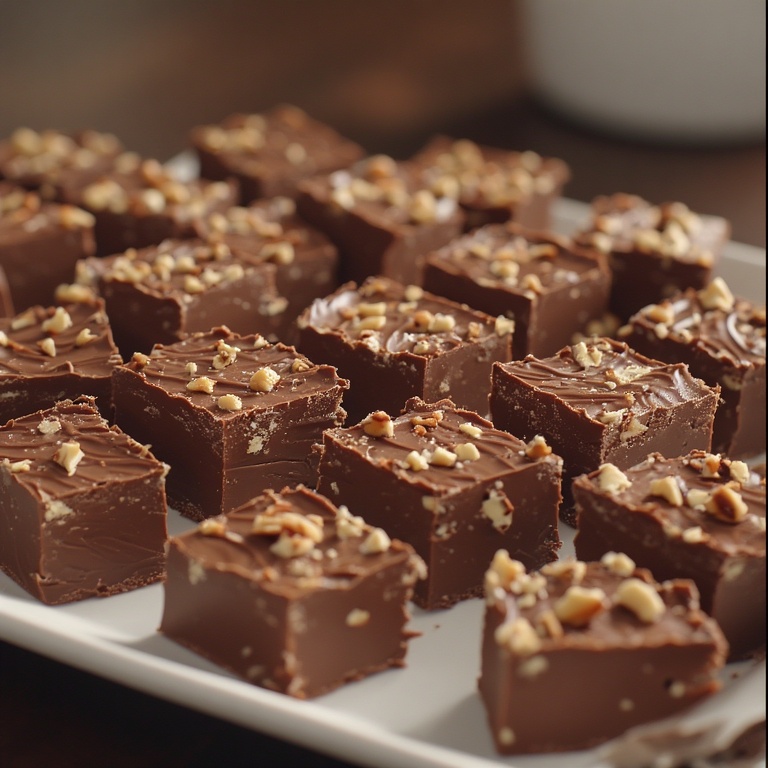
Mamie Eisenhower’s Fudge: A Presidential Recipe That’s Stood the Test of Time
When a recipe has been cherished for over 40 years and carries the name of a First Lady, you know it’s something special. Mamie Eisenhower’s fudge recipe represents classic American confectionery at its finest—rich, chocolatey, and incredibly satisfying. This isn’t just any fudge; it’s a piece of culinary history that continues to delight families across generations.
What makes this fudge truly remarkable is its generous yield and foolproof method. With about 6 pounds of finished fudge, this recipe is perfect for holiday gift-giving, bake sales, or simply keeping your candy jar well-stocked throughout the season. The combination of milk chocolate, semisweet chocolate chips, and marshmallow creme creates a texture that’s both creamy and firm—never grainy or overly soft.
Preparation Time: 20 minutes
Chilling Time: Several hours or overnight
Total Time: Variable (includes chilling)
Yield: Approximately 6 pounds (about 100 one-inch squares)
The History Behind This Famous Fudge
Mamie Eisenhower, wife of President Dwight D. Eisenhower, was known for her warm hospitality and love of entertaining at the White House during the 1950s. While she wasn’t particularly fond of cooking herself, she greatly appreciated good food and made sure the White House kitchen produced memorable dishes. This fudge recipe became one of her signature contributions to American home cooking.
The recipe gained widespread popularity when it was shared with the public, and home cooks across the country began making it for their own families. Its simplicity, combined with consistently excellent results, helped it become a beloved holiday tradition in countless households. Today, it remains a testament to mid-century American candy-making—uncomplicated, reliable, and absolutely delicious.
Understanding the Ingredients
Butter (1 tablespoon plus ½ cup, divided)
The butter serves two purposes in this recipe. A small amount greases your pan to prevent sticking, while the larger portion enriches the fudge itself, adding smoothness and helping create that characteristic melt-in-your-mouth quality.
Milk Chocolate Candy Bars (15.55 ounces total)
This combination of two 7-ounce bars and one 1.55-ounce bar creates the distinctive milk chocolate flavor that defines this fudge. Breaking them into pieces before adding ensures they melt evenly and completely when the hot sugar mixture is poured over them.
Semisweet Chocolate Chips (4 cups)
The semisweet chocolate chips provide depth and balance to the sweeter milk chocolate. Together, they create a complex chocolate flavor that’s neither too sweet nor too bitter. Using chips rather than chopped chocolate ensures consistency in melting.
Marshmallow Creme (7-ounce jar)
This ingredient is crucial for achieving the perfect fudge texture. Marshmallow creme helps prevent crystallization during the cooking process and contributes to the smooth, creamy consistency. It also adds a subtle vanilla note and helps the fudge maintain its structure without being too firm.
Evaporated Milk (12-ounce can)
Not to be confused with sweetened condensed milk, evaporated milk has had about 60% of its water removed, making it thicker and creamier than regular milk. This concentration is essential for the fudge’s texture and richness. It also helps the sugar mixture reach the proper temperature without scorching.
Granulated Sugar (4½ cups)
The foundation of any fudge, sugar provides sweetness and structure. The large quantity might seem excessive, but it’s necessary to achieve the proper candy consistency. As the sugar cooks with the evaporated milk, it undergoes chemical changes that create fudge’s characteristic texture.
Chopped Walnuts (2 cups)
The walnuts add textural contrast and a pleasant, slightly bitter note that balances the fudge’s intense sweetness. They also contribute healthy fats and a subtle earthiness. If you prefer, you can substitute pecans or omit nuts entirely for a smooth fudge.
Detailed Step-by-Step Instructions
Preparing Your Pan
Begin by lining a 13×9-inch baking pan with aluminum foil, leaving enough overhang on the sides to act as handles later. This simple step makes removing and cutting the fudge infinitely easier. Using 1 tablespoon of butter, thoroughly grease the foil. Pay special attention to the corners and edges, where fudge tends to stick most persistently.
Setting Up Your Chocolate Mixture
In a large heatproof bowl—and this bowl needs to be quite large, as you’ll be pouring a substantial amount of hot liquid into it—combine your broken candy bar pieces, chocolate chips, and marshmallow creme. Set this bowl aside where it’s easily accessible, as you’ll need to work quickly once your sugar mixture is ready.
This waiting chocolate mixture might look like an odd combination sitting there, but trust the process. When the hot sugar syrup hits it, everything will melt together beautifully.
Cooking the Sugar Mixture
Place your evaporated milk, 4½ cups of sugar, and remaining ½ cup of butter in a large, heavy-bottomed saucepan. The heavy bottom is important—it distributes heat evenly and prevents hot spots that could cause scorching. Place the pan over medium-low heat.
Stir the mixture constantly as it heats. This constant stirring serves multiple purposes: it prevents the sugar from burning on the bottom, helps the butter incorporate smoothly, and ensures even heating throughout. As the mixture warms, you’ll notice the sugar beginning to dissolve and the butter melting into the liquid.
Bring the mixture to a full, rolling boil. You’ll know you’ve reached this point when the bubbles can’t be stirred away—they keep coming even as you stir. Once you achieve this boil, continue cooking and stirring for exactly 4½ minutes. Set a timer for this; precision matters in candy making.
During these 4½ minutes, the mixture will thicken noticeably and take on a slightly darker color. The constant stirring remains crucial—any lapse could result in scorching, which would ruin the entire batch with a burnt flavor.
Combining and Finishing
The moment your timer goes off, immediately pour the hot sugar mixture over your waiting chocolate mixture. This is where the transformation happens. As the hot liquid hits the chocolate and marshmallow creme, everything begins to melt.
Using a sturdy spoon or heat-resistant spatula, stir the mixture vigorously. Initially, it will look like a mess, but keep stirring. Within a minute or two, the chocolate will be completely melted and the mixture will become smooth, glossy, and beautifully combined. The color should be a rich, uniform brown with no streaks of white marshmallow creme remaining.
Once everything is smooth and creamy, fold in the chopped walnuts. Stir just until they’re evenly distributed throughout the fudge. Pour this luxurious mixture into your prepared pan, using your spatula to spread it evenly to all corners.
The Waiting Game
Cover your pan with plastic wrap or aluminum foil and transfer it to the refrigerator. Now comes the hardest part—waiting. The fudge needs several hours to set properly, though overnight is ideal. This chilling time allows the fudge to firm up to the perfect slicing consistency.
Cutting Your Fudge
When your fudge is fully set, use the foil overhang as handles to lift the entire slab out of the pan. Place it on a cutting board. Here’s a professional tip: use a sharp knife or, for perfectly even pieces, a pizza cutter. The rolling blade of a pizza cutter glides through fudge beautifully, creating clean cuts without dragging or crumbling.
Cut the fudge into 1-inch squares. You should yield approximately 100 pieces, making this perfect for sharing, gifting, or having plenty on hand for whenever a chocolate craving strikes.
Storage and Shelf Life
Store your fudge squares in an airtight container in the refrigerator, where they’ll keep well for up to two weeks. Place sheets of waxed paper or parchment between layers to prevent sticking.
For longer storage, fudge freezes beautifully for up to three months. Wrap individual pieces or small portions in plastic wrap, then place them in a freezer-safe container or bag. Thaw at room temperature for about 30 minutes before serving.
Tips for Perfect Fudge Every Time
Use a Candy Thermometer: While this recipe doesn’t require checking temperature, having one on hand can help troubleshoot. The mixture should reach about 234-236°F (soft ball stage) during the 4½-minute boil.
Don’t Skip the Stirring: Constant stirring during the boiling phase is non-negotiable. Set aside those 4½ minutes to focus entirely on this task.
Quality Matters: Use good-quality chocolate bars and chips. The flavor of your fudge depends entirely on the chocolate you use.
Room for Creativity: While walnuts are traditional, feel free to experiment with pecans, almonds, or even dried cherries or cranberries for a festive twist.
The Pizza Cutter Trick: This simple tool creates remarkably uniform pieces and cuts through nuts cleanly without pulling them out of the fudge.
Gifting Ideas: Line small boxes or tins with parchment paper and arrange fudge pieces in layers. Wrap with decorative ribbon for beautiful homemade gifts.
Why This Recipe Works
The magic of Mamie Eisenhower’s fudge lies in its scientific precision disguised as simplicity. The combination of sugars (from both the granulated sugar and the chocolate) creates the right conditions for proper crystallization. The marshmallow creme acts as an interfering agent, preventing large crystals from forming and ensuring smooth texture. The evaporated milk provides the right concentration of milk solids and fat for optimal consistency.
The specific 4½-minute boiling time isn’t arbitrary—it’s the exact amount needed to reach the proper temperature and concentration for fudge that’s firm yet creamy, never grainy or crumbly.
Nutritional Information (per piece, based on 100 pieces)
- Calories: 107
- Total Fat: 5g
- Saturated Fat: 2g
- Cholesterol: 4mg
- Sodium: 17mg
- Total Carbohydrates: 16g
- Sugars: 14g
- Protein: 1g
- Fiber: 1g
Why This Recipe Has Endured
In an era of complicated, trendy desserts, there’s something deeply satisfying about a recipe that’s remained virtually unchanged for over four decades. Mamie Eisenhower’s fudge represents a simpler time when homemade candy was a cherished holiday tradition and recipes were shared between neighbors and friends.
This fudge delivers exactly what it promises: rich chocolate flavor, satisfying texture, and consistent results. It doesn’t require specialized equipment, hard-to-find ingredients, or advanced candy-making skills. What it does require is attention to detail, quality ingredients, and a willingness to stir for 4½ minutes—a small price to pay for such delicious results.
Whether you’re continuing a family tradition, starting a new one, or simply want to experience a piece of American culinary history, this fudge recipe is a treasure worth making. One taste explains why it’s been disappearing from candy dishes for over 40 years—and why it will likely continue to do so for generations to come.