

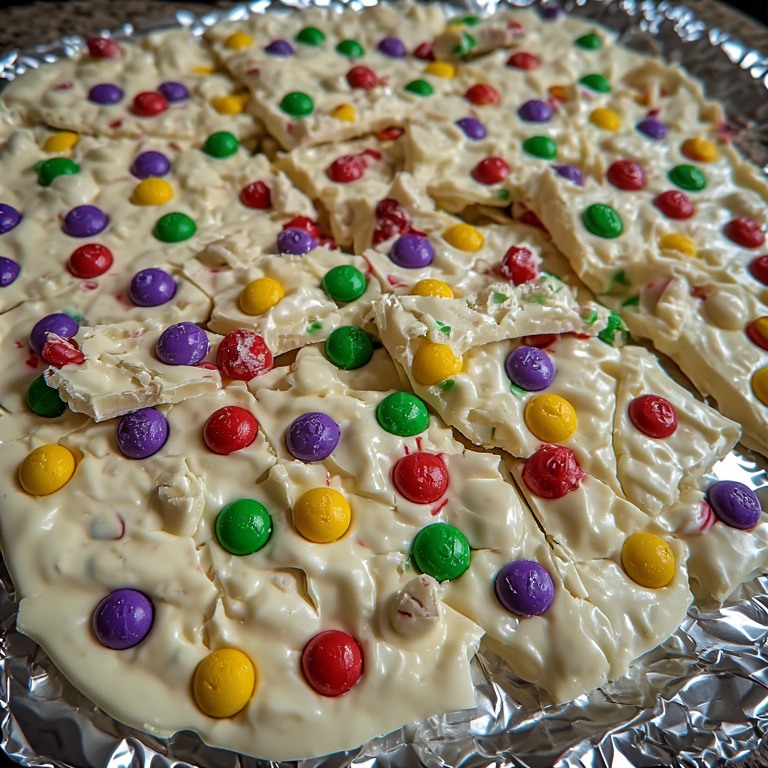
Step-by-Step Instructions
Step 1 — Prepare the Baking Sheet
Line a rimmed baking sheet (a standard half-sheet pan works perfectly) with aluminum foil, smoothing out any large wrinkles so the bark sets to an even thickness rather than pooling in dips. Set the prepared pan on a flat, level surface where it can remain undisturbed for 2 to 3 hours while the bark sets. If your kitchen is very warm (above 75°F), have a clear space in the refrigerator prepared so you can transfer the pan there to finish setting if needed.
Step 2 — Melt the White Chocolate
Pour the white chocolate chips or wafers into the slow cooker insert. Drizzle the vegetable oil evenly over the chocolate. Cover and set the slow cooker to LOW. Allow the chocolate to warm for 45 to 60 minutes total, stirring gently with a rubber spatula every 15 minutes. Do not rush the process by increasing the heat — white chocolate is sensitive to high temperatures and will scorch or seize on HIGH. Each time you stir, pull the spatula from the bottom and fold the partially melted chocolate from the edges toward the center, incorporating the warmer outer chocolate with the cooler inner chocolate. The chocolate is fully melted and ready when it is completely smooth and glossy with no visible solid pieces and flows freely off the spatula.
Step 3 — Prepare the Candies
While the chocolate melts, sort through the pastel candies and chop any pieces larger than a large marble roughly in half or thirds on a cutting board. Keep the different colors mixed together for the best visual effect — the random distribution of colors produces a confetti-like appearance that is more cheerful and more interesting than organized rows of a single color. Set the chopped candies aside in a bowl within easy reach of the prepared baking sheet.
Step 4 — Pour and Spread
Once the chocolate is fully melted and smooth, turn off and unplug the slow cooker. Give the chocolate one final stir to ensure it is evenly blended. Carefully pour the warm melted white chocolate onto the center of the foil-lined baking sheet. Use an offset spatula or the back of a large spoon to spread the chocolate outward from the center in even strokes, working to achieve a uniform thickness of approximately a quarter inch across the pan. The chocolate does not need to reach the edges of the pan — rustic, uneven edges are part of the appeal of homemade bark and give each shard a more organic, hand-crafted appearance. Work reasonably quickly; as the chocolate cools it will thicken and become harder to spread.
Step 5 — Add the Candies
Immediately — before the chocolate surface begins to set — scatter the prepared pastel candies evenly over the entire surface of the warm chocolate, working from edge to edge so every shard will be well decorated. Once scattered, gently press the candies into the chocolate surface using clean fingertips or the flat of your spatula, pressing just enough so each candy sinks slightly into the chocolate and will stay anchored when the bark is broken rather than falling off. Do not press too deeply — the candies should be clearly visible on the surface.
Step 6 — Set the Bark
Allow the bark to cool and set at room temperature, undisturbed, for 2 to 3 hours. The timing depends on your kitchen temperature — a cool kitchen (around 65 to 68°F) will set the bark faster; a warmer kitchen will take longer. The bark is fully set when it is firm and matte across its entire surface and does not indent when lightly pressed with a fingertip. If your kitchen is warm or humid, transfer the pan to the refrigerator once the surface has lost its initial shine (about 30 to 45 minutes at room temperature), and chill for an additional 30 minutes to finish setting.
Step 7 — Break and Store
Once the bark is completely firm, lift it from the pan by grasping the edges of the foil and transferring it to a cutting board. Peel the foil away from the back of the bark. Break the slab into irregular shards using your hands — position both thumbs on the underside of the bark and apply upward pressure while bending the slab until it snaps. Alternatively, use a large sharp knife to cut rough squares or rectangles. The broken edges will reveal the clean white chocolate interior with candy pieces studding the surface. Store in an airtight container layered with parchment or wax paper to prevent the shards from sticking together.
Tips for the Best Results
Stir every 15 minutes — don’t walk away. White chocolate melted in a slow cooker on LOW does not need constant attention, but it does need regular stirring to melt evenly. The chocolate near the edges of the insert warms faster than the center; folding it inward regularly ensures uniform melting and prevents the outer edges from overheating while the center is still solid.
Work quickly once the chocolate is poured. White chocolate begins to set and thicken as soon as it hits the room-temperature pan. Have everything prepared before you pour — the foil-lined pan in position, the candies sorted and chopped, and the spatula at hand. Spreading and topping should happen within 3 to 4 minutes of pouring for the best results.
Press the candies in firmly enough to anchor them. Candies that are merely rested on the surface of the chocolate, not pressed in, will fall off when the bark is broken or handled. A gentle but deliberate press with clean fingertips ensures each candy is partially embedded and stays in place on the finished shard.
Don’t refrigerate too early. Moving the bark to the refrigerator before the surface has had 30 minutes at room temperature can cause condensation to form on the chocolate’s surface when it comes back to room temperature, producing a dull, spotty appearance. Let the surface lose its initial shine at room temperature first, then refrigerate if needed to finish setting.
Use good-quality white chocolate. The white chocolate base is the dominant flavor in this bark. A good-quality white chocolate with cocoa butter produces a noticeably better result — cleaner flavor, better gloss, smoother texture — than economy white chips made with vegetable fat substitutes. The two-pound quantity is the largest cost in this recipe; buying the best white chocolate you can find for that quantity is the most impactful quality decision available.
Frequently Asked Questions
Can I make this without a slow cooker?
Yes. The double boiler method — a heatproof bowl set over a saucepan of barely simmering water, with the bowl not touching the water — is the traditional alternative and equally reliable for melting white chocolate gently. Stir constantly and keep the heat very low; the steam from the simmering water provides enough warmth to melt the chocolate smoothly. The microwave also works: heat at 50% power in 30-second intervals, stirring between each, until smooth — at 50% power the risk of scorching is significantly reduced compared to full power. Either method produces the same result as the slow cooker; the slow cooker is simply the most hands-off option.
What pastel candies work best?
Pastel jelly beans are the most popular choice for their vivid color, familiar spring association, and individual round shapes that distribute attractively across the bark’s surface. Pastel M&Ms (the standard spring variety sold seasonally) add candy-coated chocolate pieces that provide a different flavor element alongside the white chocolate base. Pastel Starburst or other fruit chews, cut into small pieces, add a chewy, fruit-flavored element. Any combination of soft or chewy pastel candies works well — the key qualities are vivid color (for visual impact), manageable size (no larger than a marble), and enough structural integrity to hold their shape when pressed into the warm chocolate rather than dissolving into it.
Can I use dark or milk chocolate instead of white?
Yes — dark or milk chocolate bark made the same way with the same method is excellent. Dark chocolate provides a more complex, bittersweet base that contrasts dramatically with the bright pastel candies; milk chocolate is sweeter and milder than dark, and closer to white chocolate in overall sweetness. Both dark and milk chocolate are less heat-sensitive than white chocolate and melt more reliably. Use the same quantity and method. Note that dark or milk chocolate as the base changes the visual character of the finished bark — the pastel candies are most visually striking against the white chocolate’s pale background.
How far in advance can I make this?
Pastel candy bark keeps well at cool room temperature in an airtight container for up to one week. It can be made 3 to 4 days ahead of a holiday or gathering with no quality loss — the texture and flavor remain unchanged. If your kitchen runs warm (above 72°F), store in the refrigerator and bring to room temperature for 10 minutes before serving. The bark also freezes well for up to 2 months in an airtight container; thaw at room temperature for 30 minutes before serving.
How do I package this for gifts?
Pastel candy bark is one of the most gift-friendly homemade confections available. Individual shards packaged in small cellophane bags tied with pastel ribbon are a simple, attractive presentation. A small tin lined with tissue paper and filled with a generous pile of shards is a slightly more substantial gift. Mason jars with decorative lids are a charming option that allows the colors of the bark to be visible through the glass. For Easter baskets, tuck several shards among the traditional basket fillings for a homemade element that distinguishes the basket from store-bought versions. The bark travels well and holds its appearance for the duration of reasonable shipping if packaged with sufficient cushioning to prevent breakage.
Variations Worth Trying
Marbled chocolate version: Use 1½ pounds of white chocolate and half a pound of milk or dark chocolate, melting them separately in two batches. Pour the white chocolate onto the prepared pan first and spread it, then immediately drizzle the melted dark or milk chocolate over the surface in ribbons. Use a toothpick or skewer to swirl the two chocolates together gently — two or three broad swirling strokes create an attractive marble pattern without fully combining the colors. Scatter the pastel candies over the marbled surface immediately. The visual contrast of dark swirls against white chocolate beneath the bright pastel candies is striking.
Sprinkle and candy version: Reduce the pastel chewy candies to one cup and add one cup of pastel sprinkles (nonpareils, jimmies, or a spring sprinkle blend). Scatter both over the warm chocolate together. The sprinkles fill in the spaces between the larger candy pieces and create a more densely decorated surface that’s particularly appealing for Easter baskets or children’s treats.
White chocolate and pretzel version: Replace half the pastel chewy candies with roughly broken small pretzel pieces. The saltiness of the pretzels against the sweet white chocolate is a classic combination, and the irregular shapes of the broken pretzels add textural interest alongside the smooth candies. This version is particularly popular with adults who prefer a less purely sweet result.
Toasted coconut and pastel version: Add half a cup of lightly toasted sweetened coconut flakes alongside the pastel candies, scattering both over the warm chocolate simultaneously. The toasted coconut adds a delicate, slightly caramelized flavor and a fine, flaky texture that complements the white chocolate and contrasts with the chewiness of the candies. This version has a tropical, summery character that extends the recipe’s relevance beyond the Easter season.
White chocolate and dried fruit version: Replace the pastel chewy candies with a combination of dried cranberries, dried blueberries, and dried mango pieces — all naturally colorful. This version has a slightly more sophisticated flavor profile with a natural fruit tartness that cuts through the white chocolate’s sweetness, and it keeps longer than the candy version since the dried fruit doesn’t affect the bark’s shelf stability. A small scattering of pistachios adds green color and a savory crunch that makes the bark feel more adult.
Serving and Gifting
Set a pile of broken bark shards on a parchment-lined platter or tiered cake stand as part of a spring or Easter dessert table — it provides color and visual interest alongside more substantial desserts and guests appreciate the variety of something sweet and snackable to pick at. For a church potluck or bake sale, arrange the shards in a shallow basket lined with pastel tissue paper or in a clear container that shows off the colors. For Easter baskets, the bright pastel bark is a natural fit among the other seasonal treats, and a homemade element always distinguishes a basket. Serve with coffee or hot tea for adults; cold milk is the children’s natural pairing with anything white-chocolate-and-candy.
Storage
Store finished bark in an airtight container at cool room temperature for up to one week, with layers of parchment or wax paper between the shards to prevent sticking. Refrigerate in warm weather and bring to room temperature for 10 minutes before serving. Freeze for up to 2 months for advance preparation; thaw at room temperature with the container sealed to prevent condensation on the chocolate surface.
Three Ingredients, One Cheerful Tradition
Slow Cooker Pastel Candy Bark asks very little and returns a great deal of cheerfulness per unit of effort. Three ingredients, a slow cooker that handles the technically demanding part automatically, and a finished confection that is as pretty as it is easy — a glossy white canvas scattered with the bright colors of spring, broken into shards that look handmade because they are. It is the kind of recipe that becomes a seasonal tradition precisely because it is reliable and rewarding every time it’s made, and because the making of it is as enjoyable as the eating.
Enjoy!